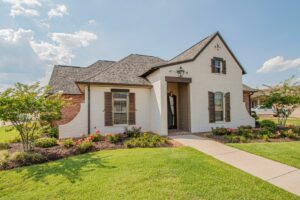
Choosing the Right Structural System for Your Custom Build: What Every Owner Should Know
If you’ve ever watched a frame going up and thought, “How did they decide to build it like that?” you’re asking the right question. The structural system you choose—wood, steel, masonry, concrete, SIPs, hybrids—drives more than just the bones of your home. It affects cost, schedule, comfort, energy use, insurance, and how the house behaves in a storm or earthquake. I’ve sat around kitchen tables with owners who regretted not thinking about structure earlier. I’ve also seen projects come in on budget and live beautifully because the team made smart structural choices right from schematic design. This guide is the conversation I wish I could have with every client before they commit.
What “structure” really means in a custom home
Let’s get clear on terms. Structure is everything that transfers the load of your house—its weight and forces from people, wind, snow, and earthquakes—down into the ground safely. That includes:
- Foundations: footings, slabs, crawl spaces, basements, piers, piles
- Vertical elements: walls, columns
- Horizontal elements: floors, roofs, beams, trusses, diaphragms
- Lateral system: shear walls, braced frames, moment frames
- Connections: bolts, straps, hold-downs, joist hangers
Performance isn’t just “don’t fall down.” Good structure handles:
- Comfort: Floors that don’t bounce; quiet rooms without footfall noise
- Movement: Minimal cracking and squeaks
- Energy: Reduced thermal bridging; good air sealing
- Durability: Moisture management; resistance to pests and rot
- Safety/resilience: Wind, snow, seismic, and fire resistance
- Buildability: Availability of materials and trades; predictable schedule
- Cost: First cost and lifetime cost (repairs, energy, insurance)
A quick vocabulary of loads:
- Dead load: Weight of the building itself (materials, finishes, equipment)
- Live load: People and furniture (typical residential floor live load is 40 psf)
- Environmental: Wind, snow, seismic, flood, soil pressure
- Special: Green roofs, heavy tile or slate, big islands, art pieces, spas
I’ve seen a kitchen island sized “just right” in a design meeting that ended up weighing 1,200 pounds when the slab, waterfall edges, and built-ins were added. That changed beam sizing and deflection criteria in that zone. Structure starts with assumptions; it works best when those assumptions are real.
A simple decision framework that owners can use
Before you fall in love with a system, run your project through this filter. It will save you money and headaches.
1) Site and soil
- Slopes, setbacks, and access: Hillside sites may limit cranes and trucks and push you toward lighter systems or hybrid solutions.
- Soil type and bearing capacity: Get a geotechnical report early. It impacts foundation type, depth, drainage, and cost more than any other single factor.
- Water: High water table? Floodplain? Plan for waterproofing, buoyancy, and elevated foundations.
2) Program and spans
- Big open spaces and large glass walls need longer spans or special frames (glulam, steel, moment frames).
- Room-by-room: Libraries with heavy built-ins, stone baths, and rooftop decks all increase loads.
- Deflection criteria: Floors under tile often need L/480 deflection; under hardwood, L/360 can work. If your living room is a dance floor (it happens), you’ll want to upsize joists or switch to stiffer systems.
3) Climate and hazards
- Wind and hurricanes: Uplift and continuous load path detailing are non-negotiable. Roof shape matters.
- Snow: Big roof overhangs and low-slope roofs take more snow. Snow loads can exceed 70 psf in some mountain regions.
- Seismic: Soft-story garages and big window walls need careful lateral design. Ductility matters.
- Wildfire: Exterior wall materials, soffits, vents, and window glazing are just as important as defensible space.
4) Budget
- Establish a structure budget “allowance” early. For a custom home, the structural shell (foundation + framing + sheathing + primary connectors) typically runs 12–20% of construction cost, but that range widens with basements, steel, or complicated sites.
- Compare systems by total installed cost and downstream impacts (insulation, air sealing, cladding attachments, finishes).
5) Schedule and labor
- What are your local trades good at? If your region frames 90% of homes in wood, an ICF or steel experiment might stretch your schedule and budget unless you hire a specialized crew.
- Material Lead Times: Engineered lumber, steel, and trusses can be 4–10+ weeks depending on market conditions.
6) Aesthetic and coordination
- Exposed beams? Thin rooflines? Floor-to-ceiling glass? These dictate certain systems or hybrids.
- Mechanical and plumbing: Will ducts and drains fit? Structure strongly influences MEP routing and ceiling heights.
7) Sustainability and insurance
- Embodied carbon: Wood tends to be lowest; concrete and steel can be optimized with mixes and recycled content.
- Energy: Continuous insulation is easier with some systems (ICF, SIPs).
- Insurance: In wildfire or hurricane zones, some systems lower premiums.
8) Future adaptability
- Plan for heavy solar arrays, rooftop decks, or a future second story by upgrading key beams and connections now.
- Leave chases or accessible routes for future services.
Pro move: Turn this into a one-page project brief and keep it visible. When you debate a structural choice, check it against the brief.
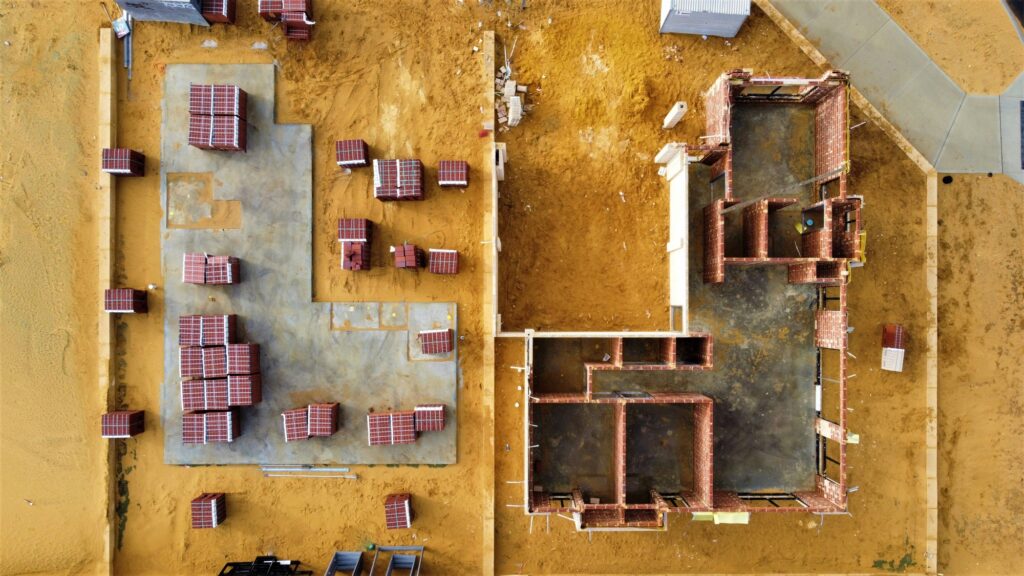
Foundation choices you’ll face (and how they ripple)
Your foundation sets the tone for the whole build. Correct a mistake here, and the rest goes smoother.
Slab-on-grade
- Best for: Level lots with good soils; warm and moderate climates; accessible living
- Variants: Conventional slab, post-tensioned slab, frost-protected shallow foundation (FPSF)
- Cost: Typically the least expensive foundation type; expect $10–$18 per sqft of slab in many markets for basic work, more with thickened edges, insulation, and polishing
- Schedule: Fast—form, pour, and you’re framing within a week or two
- Pros:
- Budget-friendly; minimal excavation
- Clean mechanical layout when planned (under-slab rough-ins)
- Works well with radiant floor heating
- Cons:
- Hard to modify later (add plumbing? You’re saw-cutting)
- Moisture and radon require diligent detailing
- Comfort: Thermal break at slab edges is critical; otherwise, cold floors in winter climates
- Notes from the field:
- Where frost depth is >18 inches, consider FPSF with perimeter insulation.
- If you’re eyeing stained/polished concrete floors, get a finish specialist involved early to protect the surface during construction.
Crawl space
- Best for: Sloping lots; moderate to cold climates where underfloor access is valuable
- Cost: Typically 10–25% more than slab-on-grade (site dependent)
- Pros:
- Easy access for MEP; easier remodels
- Keeps finished floor above grade and moisture
- Cons:
- Venting is controversial; sealed, conditioned crawl spaces perform better but require meticulous air and vapor control
- Potential for moisture and mold if drainage and air sealing are sloppy
- Pro tips:
- Use a sealed, insulated crawl with a robust ground vapor barrier, taped seams, and perimeter insulation.
- Keep floor framing depth in check to maintain ceiling heights while fitting ducts.
Basement
- Best for: Cold climates; sloped sites; extra program space
- Cost: Adds $40–$100+ per sqft of basement area depending on excavation, waterproofing, and finishes
- Pros:
- “Cheap” space per cubic foot
- Mechanical room, storage, or conditioned living area
- Cons:
- Waterproofing is unforgiving; hydrostatic pressure and drainage must be handled perfectly
- Egress requirements for bedrooms add cost and complexity
- Good practice:
- Request a geotech report. It will inform wall type (poured vs ICF vs CMU), drainage (perimeter drain, sump), and floor slab vapor barriers.
- Invest in exterior waterproofing membranes and proper backfill—not just dampproofing.
Piers and piles
- Best for: Coastal, flood, or poor soils; steep sites; boardwalk-style access
- Cost: Highly variable; helical or driven piles can be $75–$200+ per linear foot installed, plus grade beams
- Notes:
- Elevation above base flood elevation (BFE) is often required to reduce insurance
- Design lateral bracing for wind and wave action; corrosion resistance is essential
Post-tensioned slabs
- Use: Expansive soils; long slab spans; production building in some regions
- Cost: Slightly higher first cost than conventional slab, potentially lower long-term crack maintenance
- Caution:
- Never drill or saw-cut without locating tendons; cutting a tendon is dangerous and expensive
The main above-grade structural systems
No one system is “best.” The right one matches your site, goals, budget, and the skills of your local trades. Here’s a side-by-side look from the standpoint of an owner making decisions.
Conventional light wood framing (stick built)
- What it is: Dimensional lumber studs (2×4 or 2×6), joists, and rafters/trusses with plywood/OSB sheathing
- Cost: Generally the lowest first cost in North America; shell framing and sheathing often $20–$35 per sqft of floor area in many markets (excluding finishes, MEP, windows/doors)
- Schedule: Fast with experienced crews; 2,000–3,000 sqft homes often framed in 3–6 weeks
- Spans: I-joists 16–22 feet commonly without beams; solid-sawn joists 12–16 feet; engineered LVLs extend spans
- Pros:
- Labor pool widely available; easy to modify
- Works with common cladding and roof systems
- Strong code support and product ecosystem (trusses, connectors)
- Cons:
- Thermal bridging through studs without continuous exterior insulation
- Sound isolation requires detailing
- Vulnerable to termites/rot if water management is poor
- Watch-outs:
- Deflection and vibration in long-span floors. Ask for I-joists sized to L/480 deflection at minimum for living spaces, or thicker subfloor (23/32″ or 7/8″) glued and screwed.
- Don’t skimp on shear wall nailing patterns and hold-downs in high wind/seismic zones.
- Real example:
- 2,400 sqft two-story in the Midwest, 2×6 walls with exterior mineral wool, I-joist floors, plated trusses: shell framed and sheathed in 4 weeks. Added $4,800 to upsize floor joists and sheathing but eliminated complaints about bouncy floors.
Engineered wood and mass timber (LVL, PSL, glulam, CLT)
- What it is: Manufactured wood elements with predictable strength; CLT is a solid wood panel used for floors/walls/roofs
- Cost: LVLs and glulams cost more per unit than dimensional lumber but can reduce posts and increase spans; CLT currently carries a premium and often makes sense in exposed, architecturally driven projects
- Pros:
- Longer spans, fewer supports
- Beautiful exposed structure (glulam/CLT)
- Lower embodied carbon than steel/concrete
- Cons:
- Lead times; requires shop drawings
- Moisture sensitivity before enclosure—plan weather protection
- Use cases:
- Great rooms with vaulted ceilings, exposed beams
- Second-floor clear spans over wide kitchens without downstands
- Tip:
- Order early. LVL and glulam lead times can be 3–8 weeks depending on market conditions.
Heavy timber / post-and-beam
- What it is: Structural grid of larger wood beams and columns; often infilled with framed or SIP walls
- Cost: Premium over light wood; depends on exposure and finish level
- Pros:
- Warm aesthetic; fewer interior load-bearing walls
- Fire performance can be favorable; large timbers char rather than quickly burn through
- Cons:
- Requires coordination for connections and shrinkage
- Needs diaphragm and lateral system design beyond the posts and beams themselves
- Pro move:
- Pair timber with SIPs for fast enclosure and good energy performance, or use framed/insulated walls with exterior continuous insulation to manage thermal bridges at posts.
Structural steel frame
- What it is: Beams and columns (W-shapes, HSS tubes) with metal deck or wood joists; lateral system by braced or moment frames
- Cost: Structural steel elements usually cost more upfront; installed costs vary widely but budget $35–$70+ per sqft portion of the building area that’s steel-framed, plus fireproofing if required
- Schedule:
- Shop drawings and fabrication add 6–10+ weeks; erection can be very fast (days to a couple weeks for residential scale)
- Pros:
- Long, clean spans; slender profiles; big glass walls; easy to cantilever
- Prefabrication precision; fewer interior supports
- Cons:
- Thermal bridging at steel penetrating the envelope; demand careful detailing
- Corrosion protection and fireproofing in some jurisdictions
- Higher embodied carbon unless using high recycled content
- Good fits:
- Urban infill with tight sites and crane access
- Contemporary designs with large openings and thin rooflines
- Tip from experience:
- Engage a steel fabricator during design development. A small change to beam sizes or connection types can save weeks and thousands.
Light gauge steel (LGS) framing
- What it is: Cold-formed steel studs and joists for walls, floors, and roofs
- Cost: Material more than wood; labor similar or higher depending on crew experience
- Pros:
- Dimensionally stable; no rot or termites
- Prefab panelization possible; straight walls and true planes
- Cons:
- Thermal bridging is significant; needs robust continuous insulation
- Sound can travel unless walls/floors are decoupled and insulated well
- Use cases:
- Coastal environments with termite pressure; multifamily; modern designs with panelized walls
Masonry (CMU/block) and structural brick
- What it is: Concrete masonry units (CMUs) or structural brick for load-bearing walls
- Cost: Variable; labor-intensive; often paired with concrete or steel framing for floors/roofs
- Pros:
- Robust, durable; good fire resistance
- Thermal mass can help in some climates
- Cons:
- Air sealing and insulation require extra attention; not inherently high R-value
- Requires masons; weather-dependent
- Pro detail:
- Use insulated CMU or interior/exterior continuous insulation to hit energy targets. Many owners underestimate the effort to meet modern energy codes with masonry alone.
Insulating Concrete Forms (ICFs)
- What it is: Hollow foam blocks or panels that stack, rebar placed, concrete poured; built-in continuous insulation
- Cost: Typically 3–8% premium over wood framing for full-height walls, but can be cost-competitive when factoring insulation, air sealing, and soundproofing
- Pros:
- Excellent air tightness; whole-wall R-values around R-20 to R-24 with EPS forms, higher with thicker foam
- High mass; quiet interiors (STC 50+)
- Strong against wind and debris; good in hurricane/tornado-prone areas
- Cons:
- Requires trained crews; proper bracing for straight walls
- Attachment for cladding and cabinetry requires planning (embedded furring/straps)
- Use cases:
- Basements that don’t feel like basements; coastal or high-wind zones; energy-focused builds
- Tip:
- Coordinate window/door bucks meticulously to avoid thermal bridging and water intrusion. Keep pour lifts moderate to prevent blowouts.
Structural Insulated Panels (SIPs)
- What it is: Factory-made panels with foam core (EPS, XPS, or polyurethane) sandwiched between OSB or other skins; used for walls and roofs
- Cost: Material premium; labor savings from speed; often pencils out similarly to high-performance stick framing when you include air sealing and insulation costs
- Pros:
- Fast shell erection; very airtight; high R-values (6.5″ EPS core panel around R-24 to R-26; polyurethane cores higher)
- Reduced thermal bridging; great for roofs
- Cons:
- Electrical and plumbing need planning (chases, surface runs, or interior service walls)
- Moisture management at panel joints is critical; avoid roof leaks at all costs
- Best fits:
- Energy-focused builds; simple to moderate geometries; timber frame hybrids
- Advice:
- Order early and lock the design; field changes to SIPs are painful.
Cast-in-place concrete and tilt-up
- Residential use: Typically for foundations and basements; occasionally for above-grade walls with architectural finishes or in modernist designs
- Pros:
- Durability, mass, security; excellent for retaining and below-grade
- Cons:
- High embodied carbon; insulation and air sealing must be designed in
- Optimization:
- Use low-carbon concrete mixes (high SCMs like fly ash, slag, or newer LC3 blends). Request Environmental Product Declarations (EPDs) from ready-mix suppliers.
Hybrid systems (often the smartest play)
Most custom homes benefit from a mix:
- ICF basement + wood-framed upper floors
- Steel moment frame at a big window wall + wood shear walls elsewhere
- Timber beams for the great room + SIP roof for performance
- CMU stair/elevator core + wood or steel perimeter
Hybrids balance cost, speed, performance, and aesthetics. The key is clean load paths and connections across materials.
Lateral systems and why you should care
When wind hits or the ground shakes, the lateral system keeps the house upright and limits damage. Think of it as the “sideways” structure.
Common systems:
- Shear walls: Plywood/OSB-sheathed wood or light-gauge walls; CMU/ICF walls; great for houses when placed correctly
- Braced frames: Steel or wood diagonal members; efficient but visible if interior
- Moment frames: Special bolted/welded steel connections that resist rotation; allow big openings with no diagonals
Owner-level decisions that affect lateral design:
- Big openings near corners reduce shear wall lengths; you may need steel.
- Garage doors under living space often create a “soft story.” This is a common earthquake failure mode. If you want that, budget for moment frames or proprietary shear panels.
- Roof and floor diaphragms (the horizontal sheathing) must tie into walls. Skylights and complex roofs can interrupt this.
Checklist:
- Ask your engineer for a lateral plan you can read. Find where the shear walls or frames are and keep them clear. Changing these late gets expensive.
- Specify continuous load path hardware early (hold-downs, straps, hurricane ties). It helps the framer order correctly and avoid backcharges.
Roof structures: the overlooked budget lever
- Trusses vs rafters:
- Trusses are engineered with plates; they span far, are cost-effective, and go up quickly. They do constrain attic space unless designed as attic trusses.
- Rafters with ridge beams fit custom geometries and vaulted ceilings but can be more labor-intensive.
- Heavy roofs:
- Asphalt shingles: ~2.5–3.5 psf
- Standing seam metal: ~1–1.5 psf
- Concrete/clay tile: ~9–12 psf
- Slate: ~8–10 psf Heavier roofs may require larger rafters/trusses, beefier connections, and more lateral resistance. Don’t pick tile late—you’ll be resizing members.
- Snow country:
- Consider unbalanced snow load, drift at valleys and leeward sides, and ice dams.
- Steep, simple roofs shed snow better; complex hips and valleys hold it.
- Ventilation and energy:
- Ventilated attics with baffles are forgiving; unvented assemblies require precise air and vapor control. SIP roofs are fantastic when detailed correctly.
Coordination and procurement: where budget meets reality
- Engineered trusses and I-joists:
- Get plant-engineered truss drawings. The framer needs them; the plumber needs to know where to avoid cutting.
- Steel:
- Shop drawings and connection design take time. Early decisions lower change orders.
- ICF/SIPs:
- Work with manufacturer reps; they’ll review plans for module sizes, bucks, and panel joints. This saves time onsite.
- MEP coordination:
- Structure dictates duct and pipe routes. I block out a “mechanical highway” in every floor framing plan. It prevents destructive holes later.
- Sequence and weather:
- Mass timber and SIPs need weather protection. Temporary roofs or speed matter.
Lead times (subject to market conditions):
- LVL/glulam: 3–8 weeks
- Pre-engineered trusses: 2–6 weeks
- Structural steel: 6–12+ weeks (including shop drawings)
- SIPs: 4–10+ weeks after approvals
- ICF: Typically available, but forming crews schedule out
Real-world scenarios to learn from
1) Hillside home in seismic and wildfire country (Northern California)
- Goals: Big glass wall overlooking the valley; modern lines; WUI-compliant exterior; minimal interior posts
- Site: 2:1 slope, expansive clay, high fire severity zone
- Structural approach:
- Deep piers and grade beams per geotech; post-tensioned grade beams to manage expansive soils
- Steel moment frame at the view wall for 30-foot clear opening
- Wood shear walls elsewhere; roof diaphragm tied across the ridge with blocking and strapping
- Exterior cladding over mineral wool continuous insulation; non-combustible soffits and ember-resistant vents
- Lessons:
- The moment frame solved the view wall but introduced thermal bridges. We used thermal break clips at the steel-to-exterior attachment and insulated steel that penetrated the envelope.
- Schedule: Steel shop drawings added 5 weeks, but the erection took 3 days.
- Cost impact: Steel frame and connections added ~$65k vs all-wood, but it unlocked the architecture and reduced the number of interior posts and beams.
2) Mountain house with deep snow (Rockies)
- Goals: Warm, quiet home with a timber feel; energy efficient; simple maintenance
- Site: 7,000 ft elevation, ground snow load ~70 psf
- Structural approach:
- ICF basement up to first floor for warmth and quiet
- Glulam beams and ridge with stick-framed walls; SIP roof panels for high R-value and quick dry-in
- Beam pockets detailed for thermal breaks; oversized roof overhangs with steel snow guards
- Performance notes:
- SIP roof at R-42 equivalent; blower door came in at 0.8 ACH50 without extreme heroics
- Floor vibration wasn’t an issue due to shorter spans and glulam beams at key lines
- Cost and schedule:
- Shell premium of ~6% over a conventional frame, offset by lower mechanical load and energy bills
- SIPs cut 2 weeks off schedule; we needed to book the crane well in advance
3) Coastal build with hurricanes (Florida Panhandle)
- Goals: Elevated living with parking below; big porches; low insurance premiums
- Site: AE flood zone; exposure to 140+ mph design winds; corrosive salt air
- Structural approach:
- Driven timber piles with concrete grade beams; elevated floor with precast planks
- ICF exterior walls; concrete tie beam at top; standing seam metal roof with continuous clips
- All connections stainless or hot-dip galvanized; continuous load path from roof to piles with documented hardware
- Key details:
- Hip roof handled uplift better than a gable and lowered insurance
- Garage below designed with breakaway walls per code
- Outcome:
- Wind mitigation report earned meaningful insurance discounts
- First cost higher than wood framing, but very robust and low-maintenance
4) Value-driven “barndominium”
- Goals: Big open volume, workshop + living, lower cost per square foot
- Structural approach:
- Pre-engineered metal building (PEMB) shell with standing seam roof; slab-on-grade with thickened edge
- Interior framed pods in wood for bedrooms and baths
- Insulation strategies: high-density spray foam under roof, or insulated metal panels; pay attention to condensation control
- Pros:
- Long clear spans for shop; speed of erection
- Cost-effective square footage
- Caveats:
- Moisture and thermal bridging require careful detailing; add a robust vapor retarder and continuous insulation where required
- Acoustics: Hard surfaces can be echoey; plan absorptive finishes inside the living areas
Costs, timeframes, and where money hides
These are broad ranges; local markets vary. Think of them as starting points to build a project-specific budget.
- Geotechnical report: $2,000–$6,000 for typical residential; complex hillsides higher
- Structural engineer (custom home):
- $4–$10 per sqft of conditioned space, or 1.0–2.5% of construction cost depending on complexity
- Foundations:
- Slab-on-grade: $10–$18/sf basic; more with thicker slabs, insulation, and polishing
- Crawl space: +10–25% over slab
- Basements: $40–$100+/sf of basement
- Piles/piers: Highly variable; can add $30k–$150k+
- Framing and shell:
- Stick-framed shell: $20–$35/sf of floor area for framing and sheathing
- Engineered lumber premiums: Add 10–25% to framing material line
- Steel frames: $35–$70+/sf of steel-framed area, plus fabrication and crane
- ICF walls: 3–8% premium over comparable framed walls when energy and sound benefits included
- SIPs: Often cost-neutral to slight premium vs. high-performance framing when factoring insulation and air sealing; faster dry-in
- Schedule:
- Wood framing: 3–6 weeks for a 2,500 sqft house shell
- ICF walls: 1–2 weeks per level with trained crew
- Steel erection: A few days to two weeks after shop drawings and delivery
- SIP roof install: 3–7 days for typical house with crane
Hidden costs and how to manage them:
- Architectural ambition without structural planning:
- Tall, unsupported corners and giant door panels trigger steel and complex hardware. Get a structural concept during schematic design.
- Heavy finishes:
- Stone cladding, tile roofs, stone counters, and big fireplaces add load. List them early.
- Thermal bridges:
- Steel and concrete need thermal breaks at envelope penetrations. Plan for specialty clips and insulation.
- Change orders from MEP conflicts:
- Coordinate beam depths and duct runs in Revit or 2D overlays. It’s cheaper to move a duct on paper.
Performance, comfort, and quality-of-life factors
Floor stiffness and vibration
- Owners rarely say “I wish my floors were bouncier.” Long spans with light framing can feel springy even if structurally safe.
- Ask your engineer to check vibration criteria (frequency >8 Hz target is common for comfort in residential).
- Simple fixes:
- Thicker subfloor glued and screwed; closer joist spacing; deeper joists or I-joists; strategic beams or struts.
Sound
- ICF and masonry are naturally quieter.
- For wood floors, use:
- Resilient channels or hat channels with sound clips on ceilings
- Insulation batts in joist bays
- Double layers of drywall for key rooms (bedrooms, media)
- Party walls or multi-gen suites:
- Consider staggered studs or double stud walls with separate plates; STC 55+ is achievable.
Energy and air sealing
- Continuous insulation outside framing (1–2 inches of mineral wool or foam) dramatically improves whole-wall R-values in wood/LGS builds.
- ICF and SIP systems help you hit low ACH50 numbers with less site labor but still require careful penetrations and transitions.
- Mechanical systems:
- Right-size HVAC once your envelope is defined. Better structure + envelope often means smaller equipment and quieter operation.
Fire and resilience
- Wildfire zones:
- Non-combustible siding, ember-resistant vents, boxed eaves, and tempered/laminated glazing. SIPs and ICFs perform well, but cladding and detailing are what stop embers.
- Hurricane zones:
- Roof shape (hip), continuous load path, and secondary water barrier. Document for insurance.
Sustainability and embodied carbon
- Rough idea:
- A typical 2,500 sqft home can embody 30–80 metric tons of CO2e depending on materials. Structure is a big chunk of that.
- Lower your impact:
- Favor wood where it fits; ask for FSC-certified lumber.
- Use high-SCM or low-carbon concrete mixes; specify maximum cement content and strength at 56 days instead of 28 when schedule allows.
- Seek recycled-content steel and EPD-backed products.
- Design for durability and repairability—keeping a house out of the landfill for 100 years beats small material differences.
Permitting, codes, and inspections you’ll encounter
- Codes: Most US residential projects fall under IRC 2018/2021/2024 with local amendments. High wind/seismic or taller homes can trigger IBC requirements.
- Structural engineering:
- Many jurisdictions require stamped structural drawings for custom homes, especially on complex sites. Plan on it—it’s worth it.
- Geotechnical report:
- Required on many sites with slopes, poor soils, or basements. Saves money in the long run by right-sizing foundations.
- Special inspections:
- Structural steel welding/bolting, high-strength concrete, and post-tensioning often require third-party special inspectors.
- Wildland-Urban Interface (WUI):
- If applicable, you’ll need ignition-resistant materials and details. Coordinate early with your builder and design team.
Common mistakes owners and teams make (and how to avoid them)
- Picking the structure after designing the house
- Fix: Do a conceptual structural layout at schematic design. The earlier you define spans and lateral elements, the less you’ll pay later.
- Ignoring the soil report or skipping it
- Fix: Always get geotech. I’ve seen $15k spent on good soils data avoid $80k in “overbuilt just in case” foundations.
- Underestimating lateral bracing needs
- Fix: When you remove interior walls for open plans, add shear walls or frames. Don’t rely on “we’ll figure it out” during framing.
- Forgetting thermal breaks at steel and concrete
- Fix: Detail structural thermal breaks and insulation continuity at balconies, canopy steel, and slab edges.
- Poor MEP coordination
- Fix: Reserve beam-free zones for ducts. Use web-joists or pre-planned openings.
- Cutting big holes where structure wants to live
- Fix: Every tub drain, island vent, and fireplace flue needs a path. Coordinate to avoid notching beams or hacking headers.
- Not planning for heavy roofs or finishes
- Fix: Lock roof material early. If you might switch from shingles to tile, design for tile upfront.
- Value engineering the wrong way
- Fix: Don’t “save” by thinning subfloor or removing hold-downs. Trim complexity instead: simplify rooflines, standardize spans, reduce corners.
A step-by-step plan to choose your structural system
1) Clarify goals and constraints
- List your top 5 priorities (budget, speed, energy, aesthetics, resilience).
- Note special loads (tile roof, rooftop deck, heavy kitchen, piano, gym equipment).
2) Get the right reports and people
- Hire a geotechnical engineer if there’s any question about soils, slopes, or basements.
- Bring a structural engineer into schematic design. It pays off.
3) Sketch structural concepts with your team
- Explore at least two options: e.g., all-wood vs hybrid steel, framed walls vs ICF.
- Ask for a one-page narrative with span diagrams and lateral strategy.
4) Estimate costs and schedule impacts
- Get preliminary pricing from your builder and, if appropriate, a steel fabricator or panel supplier.
- Note lead times and who in your region can build each system.
5) Coordinate with envelope and MEP
- Pick an insulation strategy and mechanical approach that works with the structure.
- Verify duct and pipe routes in the proposed framing depths.
6) Decide on the system (or hybrid)
- Choose based on fit to your priorities and the strengths of your local trades.
- Document key assumptions: loads, roof material, large openings, and deflection criteria.
7) Lock down details and shop drawings
- Order engineered trusses, LVLs, steel, SIPs/ICFs with enough lead time.
- Review shop drawings carefully—beam sizes, connection plates, and bearing points matter.
8) Build smart
- Schedule inspections and special inspections.
- Protect materials from moisture; cover SIP and mass timber until dried in.
- Keep penetrations and field changes under control.
9) Commission and document
- Photograph structural connections before covering.
- File truss certs, steel mill certs, concrete tickets, and special inspection reports. Insurance claims and resale go smoother with good records.
Owner FAQs you might be thinking
- Will steel or ICF make my house “feel” different?
- Structurally, no—your finishes drive the feel. Acoustically and thermally, ICF tends to be quieter and steadier in temperature. Steel enables slender lines and bigger openings.
- Can I mix systems without chaos?
- Absolutely. Most high-functioning custom homes do. The trick is early coordination.
- Is mass timber overkill for a house?
- Not if you love the look and budget for it. Exposed glulams with SIP roof panels make for gorgeous spaces.
- What about termites and rot?
- Wood needs proper moisture management and, in some regions, termite protection. Details, not material alone, decide success. LGS or ICF can be advantageous in high-termite zones.
- How do I future-proof the structure?
- Oversize select beams, include blocking for mounts, leave sleeves for future services, and design the roof to handle a solar array or a future deck.
A few practical checklists
Site and soil
- Geotech report in hand
- Drainage plan: surface and subsurface
- Floodplain/WUI/seismic category confirmed
Structure and envelope
- Spans and deflection criteria set
- Lateral system diagram approved
- Thermal bridge locations identified with solutions
- Roof type and weight locked
MEP and finishes
- Mechanical routes reserved
- Tub and island drains coordinated
- Heavy fixtures and built-ins accounted for
- Acoustic targets defined for key rooms
Procurement and schedule
- Long lead items ordered
- Shop drawings reviewed
- Inspection milestones scheduled
Documentation
- Structural calcs and stamped drawings filed
- Concrete mix designs and EPDs collected
- Truss and steel certificates on file
- Photo log of connections and embeds
Lessons I keep coming back to
- The cheapest structure on paper isn’t always the least expensive build. Pay attention to the downstream effects on insulation, air sealing, MEP routing, and finishes.
- Floors sell houses. Clients remember how a floor feels underfoot and how quiet the bedrooms are. Slightly stiffer floors and smarter sound assemblies are worth it.
- Simple shapes outperform complicated ones. Fewer corners, clearer spans, and simpler rooflines make for stronger, tighter, and more affordable homes.
- Sequence is a hidden cost. ICF + SIPs can be amazingly fast if planned; a beautiful steel frame can be a headache if shop drawings are late. Get the order right.
Where to go from here
- Build your one-page priority brief using the framework above.
- Get a geotechnical opinion if your site is anything other than flat, dry, and boring.
- Ask your architect to bring a structural engineer to the table early and sketch two viable structural approaches with rough costs.
- Compare not just first cost but schedule, energy, insurance, and long-term maintenance.
- Choose the system—or hybrid—that your local trades can execute well, lines up with your goals, and keeps the building envelope simple and continuous.
If you make structure an early, deliberate choice rather than an afterthought, the whole project benefits: cleaner plans, fewer surprises, better comfort, and a house that handles whatever your climate throws at it. That’s not theory; it’s the pattern I’ve seen across dozens of builds that finished strong and stood the test of time.