How to Choose Exterior Materials That Balance Durability, Cost, and Curb Appeal
If you’ve ever stood in front of a wall of siding samples feeling a mix of excitement and dread, you’re not alone. Exterior materials are a big deal—they determine how your home weathers storms, what you’ll spend on upkeep, and how people feel when they pull into your driveway. I’ve helped clients wrestle with this choice for years, and the best decisions always balance three levers: durability, cost, and curb appeal. The trick isn’t finding a “perfect” material. It’s selecting the right system for your climate, budget, and architectural style—and executing it well.
What “durability, cost, and curb appeal” really mean
Before picking materials, align on the definitions that matter in the real world:
- Durability: Not just how long a material lasts, but how it handles your specific climate, sun exposure, pests, fire risk, and maintenance habits. True durability is a whole-system issue: the weather-resistive barrier (WRB), flashing, rainscreen spacing, and fasteners all matter as much as the cladding.
- Cost: Upfront cost per square foot installed is only half the story. Add maintenance cycles (painting, sealing, caulking), energy impacts, and replacement planning. A material that’s 20% more expensive upfront can be cheaper at year 15 if it extends repaint cycles or avoids water damage.
- Curb appeal: Not just color. Think texture, shadow lines, proportions (story heights, window alignment), transitions between materials, and how the home reads from 60 feet away. Great curb appeal usually combines restraint and contrast: one dominant field material, one accent, and crisp trim details.
Start with your constraints: climate, codes, and context
Every good exterior spec starts with the site and rules, not the sample board.
- Climate and exposure:
- Wet climates (Pacific Northwest, Northeast): Look for materials that tolerate frequent wetting and slow drying. Rainscreen assemblies (3/8 in. to 3/4 in. drainage/vent cavity) drastically reduce risk.
- Freeze-thaw regions: Masonry and stucco need careful detailing, drainage planes, and quality control to avoid spalling.
- Hot-humid (Gulf Coast): Prioritize vapor-open assemblies with excellent flashing. Termite resistance matters.
- High-UV/High-elevation: UV stability and paint performance are critical; expect shorter repaint cycles without premium coatings.
- Wildland-Urban Interface (WUI)/Fire-prone: Favor noncombustibles (fiber cement, stucco, masonry, metal) and Class A roofing. Avoid vinyl and untreated wood near ground and eaves.
- Coastal/salt spray: Stainless fasteners, aluminum or galvanized accessories, and products rated for coastal exposure.
- High wind (hurricane/tornado zones): Choose systems with tested wind ratings and proper anchor schedules.
- Codes and HOAs:
- WUI codes may prohibit vinyl and require specific ignition-resistant systems.
- HOAs often dictate colors, textures, and coverage of masonry. Get approvals early to avoid rework.
- Architectural style and structure:
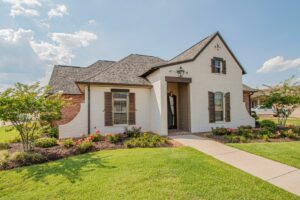
- The material must suit the house. Brick veneer on a modern minimalist box is tough to pull off; vertical board-and-batten sings on a farmhouse but can look forced on a low-slung mid-century.
- Existing foundation and framing may not support heavy claddings (brick, stone) without ledgers or thickened footings.
Life-cycle costs without the spreadsheet headache
If you want to compare apples to apples, do a simple life-cycle check:
- Initial cost: Installed price per square foot. Multiply by cladded square footage (wall area minus openings).
- Maintenance costs: Paint every X years, caulk/inspection annually, occasional repairs. Estimate annualized costs over 20–30 years.
- Replacement costs: Does it need full replacement in 20–30 years? Factor a discounted future cost.
- Energy impacts: Cladding itself doesn’t insulate much, but systems that support continuous exterior insulation can improve comfort and lower operating costs.
Quick example:
- Option A: Fiber cement lap siding at $11/sf installed, repaint every 12–15 years ($3–$5/sf per cycle).
- Option B: Vinyl siding at $7.50/sf installed, no paint, periodic cleaning.
On a 2,200-sf two-story with about 2,000 sf of cladding:
- Fiber cement initial: $22,000; paint at year 13: ~$8,000; 26-year total: ~$30,000 before inflation.
- Vinyl initial: $15,000; cleaning every 3 years ($300 DIY or $500 pro): ~$4,000; 26-year total: ~$19,000 before inflation.
Fiber cement delivers a premium look, fire resistance, and better resale in many markets. Vinyl is cheaper to own over 25 years but may be disallowed in some HOAs or WUI zones. Choose based on goals, not averages.
A fast material overview with realistic ranges
Installed cost ranges reflect 2025 US averages for mid-market homes; your region can swing ±25–40%.
- Vinyl siding (basic to premium): $5.50–$9/sf; lifespan 25–40 years; low maintenance; not WUI-friendly.
- Fiber cement (lap, panel, board-and-batten): $9–$14/sf; lifespan 40–50 years; repaint 12–15 years; fire resistant.
- Engineered wood (LP SmartSide, etc.): $8–$12/sf; lifespan 30–40 years; repaint 7–10 years; lighter than fiber cement.
- Natural wood (cedar, redwood): $10–$18/sf (more for clear grades); lifespan 20–40 years; maintenance heavy; beautiful when maintained.
- Brick veneer: $20–$35/sf; lifespan 75+; minimal maintenance; requires shelf angle/foundation support.
- Manufactured stone veneer (MSV): $20–$35/sf; lifespan 30–50+ with proper drainage; detail-sensitive.
- Natural stone veneer: $35–$60+/sf; lifespan 75+; heavy, premium.
- Traditional stucco (three-coat): $12–$20/sf; lifespan 50+; hairline cracks normal; better with rainscreen/drainage plane.
- EIFS (Exterior Insulation and Finish System): $16–$28/sf; great for energy and smooth modern look; must be drained and flashed perfectly.
- Metal siding (steel/aluminum panels): $12–$22/sf; lifespan 40–60; modern aesthetic; excellent fire resistance; watch for oil canning and fastener quality.
- PVC/composite cladding: $14–$24/sf; lifespan 30–50; low maintenance; crisp details; limited textures unless premium lines.
- Cementitious or concrete panels (high density panels, architectural concrete): $20–$40+/sf; long life; modern premium; rainscreen required.
- CMU/block (rare for residential exteriors except modern accents/retaining): cost highly variable; durable; heavy.
These ranges presume standard wall prep. Add $2–$6/sf for fully vented rainscreen battens, upgraded WRB, and stainless fasteners in coastal zones. If you’re adding continuous exterior insulation, budget another $3–$8/sf depending on thickness and furring system.
Material deep dives: what I recommend where (and why)
Fiber cement: the workhorse with upscale curb appeal
- Why people love it: With good paint, it mimics wood without the rot worries. Noncombustible, good in WUI zones, stable across climates.
- Where it shines: WUI, mixed climates, homeowners who want classic lap or board-and-batten with better durability.
- Watchouts:
- It’s heavy. Need two-person handling and dust control (silica). I require long-life blades and a vacuum system.
- End-cuts must be sealed; joints need proper flashing; clearances from grade/roof are non-negotiable.
- Caulk the right places, but don’t caulk where flashing should handle the job (kickout flashing at roof-to-wall transitions, for example).
- Paint cycles: Factory prefinished options can go 15 years before repainting; field-painted runs 10–12 years in most climates.
- Pro tip: Always pair fiber cement with a ventilated rainscreen in wet or mixed-humid zones. That $2–$3/sf ups your odds against hidden moisture damage by a mile.
Vinyl siding: low cost, low fuss, polarizing aesthetics
- Why it wins: Affordable, fast installation, easy to clean, no paint.
- Where it shines: Budget-driven projects, rental portfolios, and regions without WUI or HOA restrictions.
- Watchouts:
- Warps or melts with strong radiant heat (dark colors + southern exposure or reflections from low-E windows). Use “heat resistant” lines and deflect neighboring reflections.
- Feels out of place on high-end builds or historic styles.
- Some HOAs prohibit it, and it’s not accepted in many WUI zones.
- Pro tip: Opt for insulated backer panels in cold climates to reduce oil-canning and improve rigidity, but don’t confuse it with real exterior insulation.
Engineered wood: warmer look with manageable maintenance
- Why people like it: Lighter than fiber cement, easier to cut, looks convincingly like wood. Cost-effective in many regions.
- Where it shines: Traditional and modern farmhouse styles; fast production schedules (easy install).
- Watchouts:
- Ends and cuts need sealing. Follow nailing schedules precisely.
- Keep it off the ground and away from splashback. It’s moisture resistant, not moisture proof.
- Paint cycles: Typically 7–10 years depending on exposure and coating quality.
- Pro tip: I have painters back-prime trim components in aggressive climates. It’s not required, but it pays off at the corners and rakes.
Natural wood: unmatched character if you’re diligent
- Why it’s loved: No substitute for real cedar or redwood grain.
- Where it shines: High-end cabins, Craftsman bungalows, and projects where patina is the point.
- Watchouts:
- Maintenance is non-negotiable. Expect stain/seal every 2–4 years for transparent, 4–6 for semi-transparent, 7–10 for solid color.
- Prone to cupping/warping if not detailed with a rainscreen and back-primed.
- Termites and woodpeckers can be issues.
- Pro tip: If you want the look without the frequent staining, use cedar as an accent (gables, entry porch) and pair with fiber cement elsewhere.
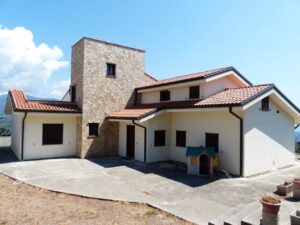
Brick veneer: timeless and tough, but heavy on structure and cost
- Why it’s great: 75+ year lifespan, minimal upkeep, excellent fire resistance, classic curb appeal.
- Where it shines: Traditional styles, southern and mid-Atlantic markets, neighborhoods that value masonry.
- Watchouts:
- Needs a shelf angle or foundation ledge; this isn’t a simple swap from lap siding.
- Weep holes, flashing over openings, and relief angles are must-haves for drainage.
- Adds weight; plan at design stage, not after framing.
- Pro tip: Use darker bricks and raked mortar joints for stronger shadow lines without costlier handmade units. If budget is tight, brick on the front elevation and a compatible lap siding elsewhere can be a smart compromise if your HOA allows it.
Manufactured stone veneer (MSV): big look, small thickness, detail sensitive
- Why it’s popular: Delivers a high-end look without full-depth stone or structural ledges.
- Where it fits: Accent walls, entry columns, wainscots.
- Watchouts:
- Historically high failure rates when installed without proper drainage and flashing—particularly around windows/doors and transitions to horizontal surfaces.
- In freeze-thaw regions, “drainable” assemblies (rainscreen or mortar screeds) are essential.
- Pro tip: Keep MSV away from grade and horizontal surfaces, and always integrate head flashings with a WRB that can drain, not just resist.
Natural stone veneer: authentic heft for premium projects
- Why choose it: Unmatched texture and longevity.
- Watchouts: Cost and weight. Movement joints and drainage matter to avoid cracks and efflorescence.
- Pro tip: Use it strategically—chimney stacks, entry base, feature walls—to control budget while keeping the luxury impact.
Stucco (three-coat): classic in the right climate, but detail it right
- Why it works: Durable, thick, and can look either Southwestern or very modern depending on texture.
- Where it shines: Dry climates; also works elsewhere with rainscreen/drainage mat.
- Watchouts:
- Cracking is normal; control joints help.
- Without a drainage plane or rainscreen, trapped moisture can destroy sheathing.
- Pro tip: I won’t do stucco over OSB without a true drainage gap and well-detailed weeps and kickout flashing, especially in wet or mixed-humid climates.
EIFS: energy-friendly and clean lines for modern exteriors
- Why it’s compelling: Continuous exterior insulation baked into the system, tons of textures, excellent for modern flat planes.
- Watchouts:
- Must be the newer “drainage” type. Early barrier EIFS systems have a bad reputation for trapping water.
- High reliance on installer skill—choose certified crews only.
- Pro tip: Transition to hard claddings (metal/fiber cement) at grade and high-impact zones to avoid puncture concerns.
Metal siding: modern vibe, serious durability
- Why builders like it: Noncombustible, low maintenance, crisp lines. Corrugated, standing seam, and flush wall panels each create different shadow behavior.
- Where it shines: Modern cabins, urban infill, fire zones, farmhouses pairing board-and-batten with corrugated accents.
- Watchouts:
- Oil canning on flat panels—specify heavier gauge and narrow widths or add stiffening beads.
- Fasteners matter: stainless or high-quality coated in coastal zones.
- Pro tip: Use concealed fastener systems in front elevations and exposed fasteners on less-visible sides to balance cost and aesthetics.
PVC/composite cladding and trims: clean lines, low fuss
- Why it’s handy: Great for tricky trim details and coastal exposure, won’t rot, paints beautifully.
- Watchouts:
- Some products move with temperature—allow expansion joints and proper fastening.
- Costlier than fiber cement trim but may save over time in tough climates.
- Pro tip: PVC for all horizontal trims (water tables, belly bands, window sills) is one of my favorite durability upgrades, regardless of the field material.
The unsung hero: the assembly behind the cladding
You can install the most bulletproof cladding and still get water damage if the layers behind it are wrong.
- WRB: Housewrap, fluid-applied, or rigid sheathing with integrated WRB. Ensure shingle-style lapping and integrate with window flashing properly.
- Rainscreen gap: A 3/8–3/4 in. drained and ventilated cavity behind the cladding dramatically improves drying. In wet climates, I consider it mandatory.
- Flashing and transitions: Kickout flashing where roof planes meet walls, head flashings over every window/door, weeps at masonry and stucco.
- Fasteners: Stainless near coasts; hot-dipped galvanized minimum elsewhere. Incorrect fasteners are a silent killer.
- Clearances: Keep cladding off grade by 6–8 inches (varies by product), above roofs and concrete patios by manufacturer spec.
I’ve investigated more cladding “failures” caused by missing kickout flashing and buried weeps than by bad siding. Get the assembly right and most materials will treat you well.
Step-by-step: how to pick the right exterior for your home
1) Define your exposure and risk profile
- Map your climate zone. Identify wind, fire, salt, and insect risks.
- Walk the site at different times of day. Note sun and drainage.
2) Set priorities with rough weights
- Durability vs. cost vs. curb appeal. For example: 40/30/30 if you plan to own 15+ years; 30/50/20 if it’s a rental or short-term hold.
3) Identify allowable styles
- Check HOA and municipal limits early. Determine your architectural style to avoid a “Franken-house.”
4) Shortlist 2–3 materials or systems
- Example combos:
- Budget classic: Vinyl lap + PVC trim accents.
- Mid-premium: Fiber cement lap + board-and-batten gables + PVC water table.
- Premium traditional: Brick or stone on front facade + fiber cement elsewhere.
- Modern: Metal panels + fiber cement panels with exposed fasteners + accent wood-look composite at entry.
5) Get realistic installed pricing
- Ask for line-item bids with:
- WRB type and brand
- Rainscreen details
- Flashing details
- Fastener types
- Trim material
- Paint/coating specs
- Apples-to-apples bids save you 10–15% in change orders.
6) Review warranties and installer credentials
- Manufacturer warranties often depend on certified installers and specific details (clearances, fasteners). Ask to see an installer’s photos and references for your exact system.
7) Test the curb appeal with real samples
- Put full-size boards on the wall, not just 4-inch chips. Look at them morning, noon, and dusk. Contrast and sheen change with light.
8) Decide with life-cycle math
- Weigh initial cost plus expected maintenance. If two options are close, choose the one that elevates the architecture.
9) Lock the details
- Approve shop drawings for panel layouts, trim profiles, and materials transitions. The devil lives in the corners.
10) Schedule smart
- Brick/stone crews and metal panel fabricators often have longer lead times. Order early, especially for custom colors.
Real-world scenarios and numbers
Case 1: Midwestern two-story, 2,200 sf, no HOA, wind exposure moderate
- Goal: Balanced cost, lasting curb appeal, low headache.
- Options considered:
- Vinyl lap with simple trim: $7/sf average x 2,000 sf = $14,000 installed.
- Fiber cement lap + PVC trim + rainscreen: $12/sf x 2,000 sf = $24,000; paint every 13 years ~$7,000.
- Decision: Owner plans to stay 15–20 years, likes a traditional look. Chose fiber cement with prefinished coating. Added rainscreen and PVC trims at sills and water table.
- Why it worked: The home feels “richer,” the assembly is robust, and the resale appeal offsets part of the cost. Wind-lashed wall faces were detailed with extra fasteners per manufacturer.
Case 2: Coastal Carolina cottage, hurricane zone, salt exposure
- Goal: Salt-resistant, wind-rated, minimal maintenance.
- Options:
- Vinyl prohibited by HOA. Brick too heavy for existing foundation.
- Chose aluminum or coated steel panels with concealed fasteners on front and sides; fiber cement on rear to control cost.
- Assembly: Stainless fasteners everywhere, upgraded WRB, 3/4 in. rainscreen. All trims PVC. Kickout flashing at all roof-wall transitions.
- Cost: Metal $18/sf for 900 sf; fiber cement $12/sf for 1,100 sf; total ~$31,800 plus rainscreen.
- Results: Withstood a Category 2 with no cladding failures; homeowners happy with easy hose-down maintenance.
Case 3: WUI-adjacent California farmhouse, sloped lot
- Goal: Fire resistance, classic look, fast schedule.
- Options:
- Fiber cement board-and-batten with metal roof and Class A assemblies.
- Avoided vinyl and natural wood. Stone only at entry knee walls with noncombustible base.
- Assembly: Vented soffits with ember-resistant vents, 6-inch clearance at grade, fiber cement trims, defensible space landscaping.
- Cost: Fiber cement board-and-batten $13/sf x 2,200 sf = ~$28,600; stone accents $28/sf x 250 sf = ~$7,000; total cladding ~$35,600.
- Why it worked: Passed local WUI requirements, faster than stucco, and hit the farmhouse aesthetic.
Case 4: Modern urban infill, flat roofs, bold lines
- Goal: Minimalist lines, long-term low maintenance.
- Options:
- High-pressure laminate (HPL) or fiber cement panels with open-joint rainscreen, aluminum trims, and color-matched fasteners.
- Cost: HPL panels $28–$36/sf installed; chose fiber cement panels at $18/sf to control budget.
- Keys to success: Shop-drawn panel grid aligned with window heads and sills; back-painted reveals; dark color in shaded courtyard only to reduce heat gain.
Curb appeal that pays for itself
You can take a mid-level cladding and make it look premium with the right moves:
- Get proportions right:
- Taller base (water table trim or masonry wainscot) on two-story homes helps ground the facade.
- Keep material changes at logical horizontal lines—window heads or floor lines.
- Use texture and shadow:
- Mix one smooth and one textured material for contrast: smooth panels with vertical board-and-batten gables, for example.
- Lap siding in a 6- to 8-inch exposure creates classic shadows; wider exposure looks more modern.
- Limit accent materials:
- As a rule of thumb, let one field material cover 70–80% of the elevations. Keep secondary accents to 20–30%.
- If you add stone, restrict it to an entry surround or a consistent wainscot band, not random “splotches.”
- Color strategy:
- Dark colors look sophisticated but absorb heat and fade faster. Use high-quality, UV-stable paint.
- In hot climates, lighter colors can reduce surface temperature and prolong coatings.
- Sample colors on large boards and look at them in sun and shade. Sheen changes everything.
- Trim discipline:
- Clean, consistent trim profiles beat ornate, mismatched catalog pieces every time.
- PVC or fiber cement for horizontal trims; metal head flashings over windows should be visible and clean, not buried.
- Entry moments:
- A good front door and canopy does more for perceived value than an extra accent wall. Spend here if you’re on the fence.
The roofing and siding handshake
These two must coordinate:
- Fire/wind ratings: In WUI or high-wind zones, pair Class A roofing (metal, tile, certain asphalt shingles) with noncombustible siding.
- Flashing: Roof-to-wall intersections are the leak hot spots. Kickout flashings keep rivers of water out of your walls. I make them a punch-list item on every project.
- Color and texture harmony: A heavy-profile roof (shake-look asphalt or tile) fights with busy stone and busy siding. If the roof is bold, keep the walls calmer.
Common mistakes that cost homeowners money
- No rainscreen in wet climates. Trapped moisture leads to rot behind fiber cement, engineered wood, and stucco.
- Missing kickout flashing. Water gushes behind the cladding at roof-wall intersections and into the sheathing.
- Wrong fasteners. Coastal rust stains and panel failures are almost always fastener mistakes.
- Overmixing materials. Three or more main claddings on one elevation is hard to pull off and often reads “busy” instead of “custom.”
- Ignoring clearances. Siding too close to grade or horizontal surfaces wicks moisture. Manufacturer specs exist for a reason.
- Dark colors on sun-baked elevations without upgraded coatings. Expect earlier repaint or warping with some materials.
- Picking an installer by the lowest bid. You’ll pay the difference in callbacks. Skilled crews deliver value that lasts decades.
Navigating bids and contractors like a pro
Ask every bidder these questions:
- What WRB and rainscreen method will you use? Brand and thickness?
- How will you flash windows, doors, and roofs? Show me your standard details.
- What’s your fastener spec in my zone?
- Are you certified by the manufacturer? Will the warranty be valid on my install?
- How many similar installs have you done? Can I see two local addresses?
Bid apples-to-apples by providing a scope:
- Specific cladding product and profile
- Trim material (PVC vs fiber cement vs wood)
- Rainscreen thickness and type
- Paint/coating brand and number of coats
- Flashing metals (aluminum vs galvanized vs stainless) and colors
- Access and site protection (landscaping, scaffolding)
Typical timelines:
- Vinyl/fiber cement on a 2,000-sf home: 1–2 weeks with a seasoned crew.
- Stucco: 3–4 weeks including cure times.
- Brick/stone veneer: 3–6 weeks depending on coverage and crew size.
- Metal panel systems: 2–4 weeks, plus potential shop lead times for custom colors.
Maintenance cheat sheet by material
- Vinyl: Annual rinse, soft brush for mildew. Watch for loose panels after storms.
- Fiber cement: Inspect caulk joints yearly; repaint 12–15 years for field paint, 15+ for factory finish. Keep bushes trimmed back.
- Engineered wood: Inspect bottom edges and trim annually; repaint 7–10 years depending on exposure.
- Wood: Re-seal or re-stain every 2–6 years based on stain type. Keep 8 inches off grade, use gutters to reduce splashback.
- Brick: Check weeps and mortar every few years. Repoint mortar joints as needed (often decades apart).
- Stucco: Hairline cracks are normal; seal larger cracks and keep weep screeds clear.
- Metal: Hose down salt and debris in coastal zones; check fasteners and sealants at penetrations every 2–3 years.
- PVC/composites: Occasional cleaning, repaint at 15–25 years if painted.
Keep a simple home exterior log with purchase receipts, color codes, and warranty info. It makes touch-ups and resale smoother.
Energy, sustainability, and resilience
- Exterior insulation: Cladding that easily pairs with continuous exterior insulation (EIFS, panel rainscreens, fiber cement over furring) helps hit energy targets. A 1–2 inch layer can reduce thermal bridging and improve comfort.
- Embodied carbon: Brick and concrete have higher embodied carbon than wood-based products. Fiber cement sits in the middle. If carbon is a priority, use more wood or engineered wood and pair with a resilient WRB and rainscreen to extend life.
- Fire resistance: Noncombustibles (metal, fiber cement, stucco, masonry) plus ember-resistant vents and 0–5 feet of noncombustible landscaping around the home make a measurable difference in WUI zones.
- Recyclability: Metal is recyclable; vinyl has limited post-consumer recycling options; many composites are difficult to recycle. Durability is often the greenest choice if it avoids early replacement.
What to do when your HOA has “opinions”
- Learn the pattern language: Drive your neighborhood and note what gets approved. Bring photos of nearby homes that match your proposed materials.
- Offer a “front-and-sides” compromise: Many HOAs will accept a premium material on the street-facing sides and a compatible but more affordable material on the rear and less-visible elevations.
- Use mockups: Physical sample boards with trims and color chips often win committees over more than renderings do.
The power of details: where to spend a little extra
- Corners: Consider mitered corners with fiber cement or PVC corner boards sized generously (5/4×4 or 5/4×6). Skinny corners look cheap.
- Window heads: Real head flashings with subtle reveals read “custom” and keep water out.
- Belly bands/water tables: Define the first floor; use PVC where water lands. Add drip kerfs to kick water away.
- Soffits and fascia: Vented aluminum or fiber cement soffits look clean and last longer than wood in many climates.
- Downspout placement: Align with trim; avoid a downspout that cuts across a major facade view.
Quick decision guide by climate and style
- Cold, wet, freeze-thaw, traditional style: Fiber cement lap + rainscreen + PVC trim.
- Hot-humid, termites, coastal: Metal or fiber cement with stainless fasteners; PVC trims; robust WRB.
- Dry Southwest, Mediterranean style: Three-coat stucco with drainage mat, tile or metal roof, dark window frames for contrast.
- WUI/fires: Fiber cement or metal, minimal combustible details, covered soffits with ember-resistant venting, Class A roof.
- Modern minimal: Panelized fiber cement or HPL with open-joint rainscreen, tight alignment, metal accents, limited colors.
Budget levers that don’t hurt curb appeal
- Keep one dominant cladding: Simpler elevations are faster to install and cheaper to detail.
- Use accents strategically: Apply stone or brick at the entry only; skip random bands that add cost and complexity.
- Prefinished products: Factory-applied coatings last longer and reduce on-site labor.
- Standard colors: Custom colors often add lead time and premiums.
- Trim smart: Use PVC or fiber cement trims in high-wet zones only; standard fiber cement or engineered wood elsewhere.
What builders and inspectors look for (and you should too)
- Documentation: Manufacturer install guides on site; inspectors may ask. A crew that follows the book protects your warranty.
- Flashing continuity: WRB shingle-lapped over head flashing, not under it. Simple, but commonly missed.
- Weep details: Present on stucco, brick, and stone. If you can’t see a path for water to get out, that’s a red flag.
- Clean cut ends: Primed/sealed before installation on wood-based and fiber cement products.
- Deck and cladding interface: Proper ledger flashing and a clear gap. Deck failures love sloppy flashing.
Frequently asked “what would you do?” choices
- “I want farmhouse board-and-batten. Wood or fiber cement?” If you’re not committed to maintenance, go fiber cement or engineered wood boards with PVC battens. Balance: fiber cement field + PVC trim at horizontal transitions.
- “Brick everywhere or just the front?” If budget allows and your foundation supports it, full wrap is rock solid. Otherwise, front and return a few feet on the sides. Finish the transition cleanly at an inside corner or a logical control joint.
- “Can I do dark siding in a hot climate?” Yes, with high-quality reflective coatings and ventilation behind the cladding. Expect shorter repaint cycles than with lighter colors.
- “Is EIFS safe?” Modern drainable EIFS installed by certified crews is a solid choice—especially for energy performance. Don’t skimp on details at windows and penetrations.
A simple worksheet to pick your exterior
1) What’s nonnegotiable? (Fire rating, HOA rules, style) 2) What’s your ownership horizon? (<5 years, 5–10, 10–20+) 3) How much maintenance will you actually do? (Be honest) 4) Climate risks? (Wet, freeze-thaw, salt, wind, termites, wildfire) 5) Top two looks you love—find real local examples 6) Shortlist materials and get two apples-to-apples bids each 7) Visit one job where your installer used that exact system 8) Choose the option with the best assembly details and installer track record—even if it’s not the cheapest 9) Approve shop drawings, color samples, and trim profiles 10) Maintain per the schedule you’ve set; add reminders to your calendar
Final thoughts from the field
The best exteriors come from good systems and disciplined design, not magic materials. If you invest a little more in the layers you don’t see—WRB, rainscreen, flashing—you can often choose the look you want without sacrificing durability. Keep the palette simple, the details clean, and your installer honest. That’s how you get a home that looks great on day one and still turns heads 15 years later.