How to Maximize Natural Light in Your Home Design (Owner-Builder Edition)
Designing your own home is the rare chance to hard-wire natural light into the bones of the building—so you’re not fighting glare at noon or flipping switches at 10 a.m. on a bright day. As an owner-builder, you control the site strategy, the massing, the window plan, the roof apertures, and the interior finishes that determine whether rooms feel luminous and alive or dim and dependent on artificial lighting. This guide gives you an end-to-end playbook—what to decide at each stage, how to place and size openings, how to move light deep into the plan, and how to balance daylight with glare control, privacy, and energy performance. The goal isn’t “more glass”; it’s better light: soft, even, task-friendly illumination that complements your climate and lifestyle.
Start With a Day-in-the-Life Brief (So Light Serves How You Live)
Before you sketch a single window, write a one-page light brief. Note when each room is actually used and what you’re doing there: morning coffee at the island, heads-down work in the office from 9–2, late-afternoon homework at the table, golden-hour reading in the den. Mark your personal light preferences too: do you thrive in bright, crisp spaces, or prefer warm, calm luminance? These functional and emotional cues determine orientation priorities, glazing types, and shading controls far more than any Pinterest board.
Translate that brief into measurable targets. For example, “kitchen prep counters should be naturally lit until 4 p.m.; office needs glare-free light on monitors all day; bedrooms should wake to gentle morning light but darken quickly.” This gives you something to steer by as you weigh trade-offs. Natural light is a system across the whole house; optimize it room by room and as a network.
Site, Orientation, and Climate: The Big Levers You Can’t Fake Later
Your lot is the first daylighting tool. Study sun path and prevailing winds across the seasons, note existing trees and neighboring structures, and walk the site at different times of day if you can. In most temperate northern-hemisphere climates, a south-facing orientation delivers the most controllable, even light; east gives bright mornings and cooler afternoons; west brings late-day heat and glare that must be tamed; north offers soft, studio-quality illumination with minimal shadows.
Climate matters. In cooling-dominated zones, you’ll lean into exterior shading, high-performance glass with moderate Solar Heat Gain Coefficient (SHGC), and roof overhangs that block high summer sun while admitting lower winter sun. In heating-dominated zones, you may accept a bit more winter gain and focus on air sealing and U-factor to keep the interior envelope warm. On tight urban sites, consider light courts and clerestories that pull sky light down where side setbacks are stingy. If there’s a signature view, watch how light behaves around it; resist the urge to glaze an entire wall unless the plan can control glare and heat robustly.
Massing, Roof Forms, and Floorplate Depth: Shape Controls Light
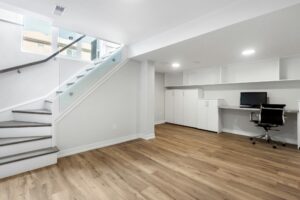
A compact, simple massing with a modest floorplate depth admits light more easily than sprawling, deep plans. As you stretch the building deeper than ~30–35 feet without interior light sources, the back of the plan goes dim. Solve with a courtyard, a light well, a double-height space, or a central stair with clerestories that bounce light down.
Roof form is a daylight engine. Shed roofs tilted toward the sun can carry clerestories up high; gable roofs are friendly to roof windows on both slopes; flat/low-slope roofs simplify skylights and solar tubes. Keep forms clean and limit tortured valleys—simple planes make water management and skylight detailing safer and cheaper. Massing choices cascade into structure and cost, so choose the light-friendly option early before other decisions harden around a dim plan.
Window Strategy: Where, How Big, and How High
Think of windows as task tools, not decorations. Start with head heights and sill heights that shape view and privacy. Running consistent head heights (e.g., 7′-6″ or 8′-0″) creates a smooth light shelf and better shade alignment. Lower sills in living areas (18–24″) bring seated-eye views and bounce light off floors; higher sills in baths or street-facing rooms preserve privacy while keeping sky view for brightness.
Distribute glass by need, not symmetry. Load more glazing on south and north walls for even light; use east for morning moments and west sparingly with shading ready. Use tall, narrow windows to pull light deeper without massive heat gain; group windows to create broad luminous walls where it matters (kitchen, dining), and consider corner glazing to flatten shadows and expand the sense of space. Align windows with task surfaces: prep counters, reading nooks, desks. Don’t be afraid of interior transoms and borrowed-light windows from bright rooms into darker ones.
Specify the Right Glass (VT, SHGC, and U-Factor That Fit Your Climate)
Three numbers matter. Visible Transmittance (VT) is how much visible light passes through (higher = brighter). SHGC is how much solar heat passes (lower = cooler). U-factor measures heat loss (lower = warmer). In hot climates, target moderate VT (so it’s bright) with low SHGC to keep heat out. In cold climates, you can accept a higher SHGC on south glazing to sip winter heat, but still demand a low U-factor. Use spectrally selective coatings that keep light high while filtering infrared, and choose warm-edge spacers to reduce condensation at edges. If you must tint, choose lightly and test real samples on site; dark blue-gray tint that looks cool in a showroom can make rooms gloomy.
Frames, Divisions, and Details That Help Light
Chunky frames reduce glass area and cut VT at the wall scale. Within budget, consider slimmer profiles—well-specced fiberglass, aluminum with thermal breaks, or wood-clad—so more of the opening is light. Limit unnecessary muntins that chop view and shade the interior. Build deep jambs with light-colored reveals; they act as mini reflectors, brightening the opening. Add splayed jambs at window wells (especially in basements) to widen the sky view and bounce more light inside.
Doors, Clerestories, and Transoms: Hidden Opportunities to Glow
Glazed exterior doors are daylight horses—full-lite doors at patios and stoops piggyback light on circulation. Clerestories—those high strip windows under a raised roof—smuggle sky light deep into plans while preserving privacy. Use them above kitchen backsplashes, over showers, and along hallways. Interior transoms above doors share light between rooms when doors are closed, softening shadows and stretching window performance. If privacy is key, use obscure glass that still passes plenty of light.
Roof Apertures: Skylights, Roof Windows, and Solar Tubes Done Right
Roof openings deliver the highest daylight per square foot because they see the bright sky dome. Skylights flood light; roof windows (operable, in-plane) add ventilation and egress in attics; tubular daylighting devices (TDDs/solar tubes) ferry daylight down slim shafts to interior baths, closets, and hallways.
Size them wisely. A common range is 3–8% of the floor area as skylight glazing for a room, adjusted by climate and reflectance. In hot climates, smaller apertures with diffusing lenses, low SHGC glass, and exterior shades control heat. In cold climates, choose high-performance curbs, insulated shafts, and warm-edge glazing to curb condensation. Shaft design matters: straight, high-reflectance (painted bright white), with minimal turns, brings far more light than a long, dark tunnel. Where you can, tilt roof windows toward the north for soft light, or add internal baffles to prevent hot spots and glare on work surfaces.
Water is the enemy; detailing is the defense. Use manufacturer-specific flashing kits, proper underlayment, and adequate curb height to ride above snow and pooling rain. Keep skylights out of complex valleys and below large trees that dump debris. A few well-placed, well-detailed roof apertures will outperform a field of mediocre holes.
Moving Light Deep into the Plan: Stairs, Double-Heights, and Light Shelves
Treat light like a fluid. Open stairs with slender guards and a roof or clerestory above can act as a luminous chimney. Double-height spaces near the center of plan bring high light down and let it bounce off pale walls and floors into adjoining rooms. Interior glazing (hall windows, borrowed-light panels beside doors) shares brightness without sacrificing acoustic separation.
On strong south exposures, add light shelves—horizontal projections at or just below window mid-height—to bounce sunlight up to the ceiling while shading the lower glass. Painted white ceilings then become giant luminaires. Pair light shelves with high head heights and a slight ceiling cove or texture that scatters light gracefully. Even a modest 8–12″ shelf can reduce glare at eye level while improving uniformity.
Shading, Glare, and Comfort: Let Light In, Keep Trouble Out
Good daylight feels effortless because glare and overheating have already been engineered out. Exterior strategies work best: roof overhangs, horizontal canopies, vertical fins, awnings, and deciduous trees that leaf out for summer shade and drop for winter sun. A quick rule of thumb for overhang sizing on south windows: divide overhang depth by window height to get a projection factor; tailor it so high summer sun is blocked while lower winter sun enters. Your climate, latitude, and facade matter—have your designer test a few variants or use a simple solar path app on site.
Inside, specify low-profile roller shades (ideally dual: sheer for glare, blackout for sleeping rooms), or tilting blinds where variable control is critical (home office). Avoid highly glossy interior surfaces that mirror windows and concentrate glare; choose matte to eggshell sheens on large planes. In screen-heavy rooms, orient desks perpendicular to windows, not facing or backing them, and consider north-light or clerestory-only strategies for workspaces where contrast control is vital.
Daylight Metrics You Can Actually Use (Without Becoming a Lighting Engineer)
Three useful concepts:
- Daylight Factor (DF): the ratio of interior to exterior light under overcast sky. A DF of 2–5% feels naturally daylit; below ~2% you’ll want lights; above ~5% risks glare unless diffused.
- Spatial Daylight Autonomy (sDA): percent of floor area that meets a target illuminance (often 300 lux) for a certain portion of occupied hours (often 50%). Higher is better, but ensure you also check glare.
- Annual Sunlight Exposure (ASE): percent of floor area receiving too much direct sun (e.g., >1000 lux for >250 hours/year). Lower is better; high ASE flags glare and overheating risk.
You don’t need software to improve these. Walk the plan with cardboard cutouts of window sizes taped to walls; sit at desk height; check views and potential glare. Use a sun path app to watch where light lands on solstices and equinoxes. A small round of digital daylight modeling by your designer, if budget allows, can verify you’re in the sweet spot.
Energy, Thermal, Privacy, and Acoustics: Balance Light with Livability
More glass is not automatically better. Glazing is weaker thermally than opaque walls; too much of it, or the wrong type, raises loads and drafts. Match glazing ratio to room and facade: big moves where they earn their keep, modest where they don’t. Use operable windows for stack ventilation and night purge in mild seasons; pair with bug screens and security latches if you sleep with windows open. If privacy is an issue, deploy fritted, reeded, or satin-etched glass selectively to keep brightness while obscuring views, especially at baths and street-level. Along busy roads, laminated glass helps with sound while preserving clarity.
Consider dynamic glazing (electrochromic) only if budgets and climates demand it; otherwise, thoughtful orientation and shading are more reliable. Most comfort issues attributed to “too much sun” are solved with exterior shade and the right SHGC, not by darkening the whole home.
Finishes and Color: Use Light Reflectance Value (LRV) Like a Pro
Interior surfaces are reflectors. Walls and ceilings with high LRV (light colors, matte/satin finishes) bounce daylight deeper and soften contrast. You don’t need all-white; even muted mid-tones with high LRV can glow. Ceilings near clerestories benefit from bright matte that becomes an even luminous plane. Floors do double duty: light wood, pale tile, or honed stone reflect light upward; super-gloss finishes can cause harsh reflections, so aim for low sheen in high-sun areas.
Cabinetry and large millwork can either drink light or share it; mixing a deeper feature tone with lighter surrounds keeps character without killing brightness. Inside light wells and window shafts, paint a bright white to maximize reflectance. Keep wide casings and deep returns pale to minimize tunnel effect.
Electric Lighting That Complements Daylight (Not Fights It)
A well-daylit home still needs great artificial light for night and storms. Layer ambient, task, and accent fixtures, and use dimming to tune output so electric light tops up rather than overwhelms daylight. High-CRI (90+) fixtures at 2700–3500K will flatter materials and skin more naturally alongside sunlight. Consider daylight harvesting controls in main living areas: photosensors that gently reduce output when sun is strong, saving energy and keeping visuals consistent.
Place downlights to flank countertops and tables, not directly over your head where they cast face shadows if the sun pops behind a cloud. Use under-cabinet LEDs for task light so overcast days still feel crisp. In offices, indirect pendants and desk lamps reduce contrast and maintain visual comfort as daylight changes.
Detailing and Construction: Make the Light Details Water- and Air-Tight
Beautiful light with sloppy detailing is an expensive leak. For every window and skylight, insist on pan flashing, side flashing, head flashing, and continuous weather-resistive barrier integration per manufacturer details. Thermal continuity matters: extend insulation to the framing around openings, use backer rod and sealant at interior perimeters, and mind air barrier continuity around the opening to avoid chilly drafts.
At skylights, build curbs to the recommended height above finished roof, use ice-and-water membranes in snow climates, and insulate the light shaft continuously to prevent condensation. For interior transoms and borrowed-light windows, acoustic gaskets at frames keep privacy while sharing glow. If you’re DIY-intensive, build a mock-up of one window bay on the ground and practice the full flashing stack before the crew repeats it twenty times up a ladder.
Budget: Where to Spend for the Most Light per Dollar
Put dollars where they unlock systemic gains. Spend on orientation and massing moves (a clerestory band or small light court can brighten half the plan), on glazing performance (VT/SHGC that fits your climate), and on exterior shading (overhangs, fins) that make glass livable year-round. Choose a few larger, well-placed windows over many small ones; glass edges are costlier than area, and larger units generally deliver cleaner light and views.
Save by standardizing window sizes to reduce custom costs, using stock roof windows and TDDs in interior zones, and reserving premium slim-profile frames for key facades. Allocate some budget for interior reflectance—paint and surface choices are cheap lumens. If you must trim, reduce decorative glass flourishes before you cut the core daylight engine (orientation, clerestories, and primary south/north glazing).
Sequencing and Procurement: Lock Light Decisions Early
Natural light choices ripple into structure, HVAC, and finishes. Lock window locations and sizes before framing packages finalize so headers and shear layouts are right. Order long-lead windows and roof apertures early; align rough openings with manufacturer specs. Coordinate shade pockets, electrical for motorized shades, and sensor locations during rough-in. Do a pre-drywall daylight walk-through around midday: confirm window placements, views, and potential glare; small shifts now avoid big regrets later.
At close-out, commission shades (set limits and groupings), verify air sealing at openings (blower-door test), and touch up interior reflectance where construction scuffs dulled key surfaces. The “set and forget” feeling you want depends on these last steps.
Common Mistakes Owner-Builders Make (and Easy Fixes)
The classic error is equating glass with light. Endless west glass without shade brings squinting and heat, not comfort. Fix with exterior shading and redistribution of glazing to south/north. Another is deep plans without a central light source; fix with a stair clerestory, small courtyard, or light well that introduces sky to the core. Many under-spec glare control; fix by combining sheer + blackout shades and orienting task surfaces thoughtfully. Others choose dark tints to manage heat; fix by selecting spectrally selective low-E that preserves VT while trimming SHGC.
Finally, some ignore privacy and acoustics. A beautiful clear window into a tight neighbor setback invites blinds all day. Fix by switching to obscure glazing above eye level, raising sills, using green buffers, or adding light-borrowing transoms from private courtyards.
Room-by-Room Strategies That Work
Kitchen: Prioritize south/east light for morning and mid-day tasks. Place a window at the sink and consider a clerestory backsplash run. Use light countertops to bounce light up, and an exterior shade over the big slider to tame late sun.
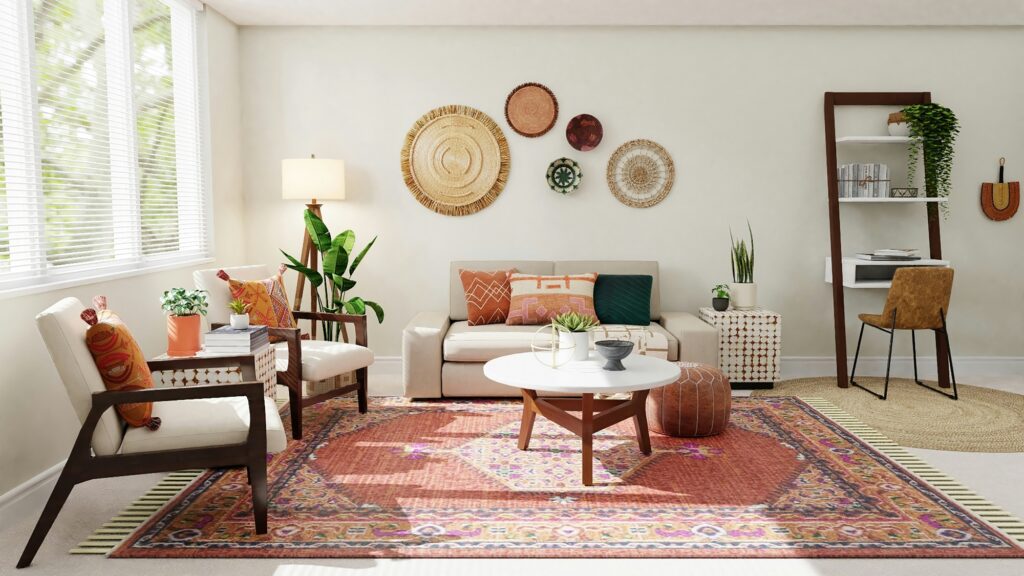
Living/Dining: Anchor with broad south/north glazing and a shaded west if needed. A light shelf can boost ceiling glow. Keep glare-free reading corners by placing chairs perpendicular to windows.
Home Office: Favor north or high clerestory light; side light to screens. Use sheer shades to trim contrast and matte finishes to curb reflections. A small east window can make mornings cheerful without afternoon heat.
Bedrooms: Aim for east for gentle wakeups; keep blackout control for sleep. High sills maintain privacy; a small north window adds soft balance. Consider venting roof windows for night purge in mild climates.
Baths: Obscure glass at eye height keeps brightness without exposure. Roof windows above showers feel luxurious; detail for moisture with proper fans and materials.
Stair/Hall: Treat as light conduits—roof windows or clerestories above landings, interior glazing to loan light to adjacent rooms.
Basement: Enlarge egress wells with splayed, reflective sides; keep interior finishes pale. Add TDDs from above if code and structure allow.
Quick Owner-Builder Checklist
- Write a light brief tied to daily routines and rooms
- Choose orientation and massing that favor south/north light and manageable depth
- Size/place windows by task; align head heights; set sills for view/privacy
- Specify glass (VT/SHGC/U-factor) for your climate; choose slim frames where it counts
- Add clerestories, transoms, or light wells to reach the plan’s core
- Use exterior shading and interior shades to control glare and heat
- Boost interior reflectance (LRV) on ceilings, walls, and shafts
- Detail flashing/air sealing meticulously at every opening
- Coordinate shades, sensors, and power at rough-in; order long-lead units early
- Walk pre-drywall at midday; adjust before it’s too late
FAQs
Do I need huge windows to get great daylight?
No. A few well-placed, well-shaded windows with high VT and coordinated interiors outshine a wall of poorly managed glass.
Are skylights risky for leaks?
Not if they’re detailed correctly with the right curbs, flashing, and underlayments. Manufacturer kits, simple roof planes, and careful install are the trifecta.
What paint color gives the most light?
High LRV matters more than exact hue. A matte, bright ceiling and pale walls near light sources amplify daylight without glare.
How do I avoid screen glare in a bright office?
Use north/clerestory side light, add sheer shades, orient screens perpendicular to windows, and keep big glossy surfaces out of the view cone.
Can trees help or hurt daylight?
Both. Deciduous trees on west/south sides are natural dynamic shades: summer relief, winter sun. Dense evergreens close to windows can darken rooms; place thoughtfully.
The Bottom Line
Maximizing natural light when you’re designing your own home isn’t about chasing glassy drama. It’s about aligning site and climate, massing and roof form, window placement and glazing performance, and interior reflectance and shading so daylight feels inevitable—soft when you need it, bright when you want it, and always comfortable. Make these calls early, detail them carefully, and your home will run on light most days without you lifting a finger. That’s the owner-builder advantage: you don’t just add windows—you design for daylight.