The Importance of Soil Testing Before Building
If you want a house that stays dry, level, and crack-free for decades, start by understanding the ground it stands on. Soil testing—often called a geotechnical investigation—is the quiet step that decides whether your foundation performs or fights physics. Because the work happens early and mostly out of sight, many owners treat it as optional. It isn’t. The difference between a smooth build and a slow-motion repair plan often traces back to the first boring, the first moisture reading, or the first compaction test you did—or didn’t—do.
Think about it this way: the soil is your hidden structural system. The right data tells your engineer how much the ground can carry, how it will move with seasons, where water will travel, and what the foundation should look like to play nicely with reality. Skipping the investigation swaps knowledge for guesswork. Guesswork becomes settlement, heave, cracking, water intrusion, and warranty drama. Soil testing is inexpensive insurance compared to the Costly Problems Club; this guide explains what the tests are, what they reveal, and how to use the results to design smarter and build faster.
Why Soil Testing Matters Long After Move-In
The first promise of soil testing for new construction is structural: the report identifies soil bearing capacity so your engineer can size footings correctly and pick the right foundation type. But the value doesn’t stop at strength. Good testing reveals expansive clays that swell and shrink, collapsible soils that settle when wet, organic layers that should be removed, frost-susceptible soils that heave in winter, and liquefaction risks in seismic zones. Each condition invites a different failure mode; finding it early means your design works with it instead of pretending it doesn’t exist.
The second promise is durability and comfort. Groundwater elevation, capillary rise, and permeability govern whether your basement stays dry, your slab stays flat, and your indoor air stays healthy. With data in hand, you can specify drainage layers, vapor barriers, sump systems, and sub-slab depressurization if radon is a concern. No marketing photo will show it, but the best-looking home is the one that quietly resists water and movement for decades because the subsurface details were right.
What a Geotechnical Investigation Actually Includes
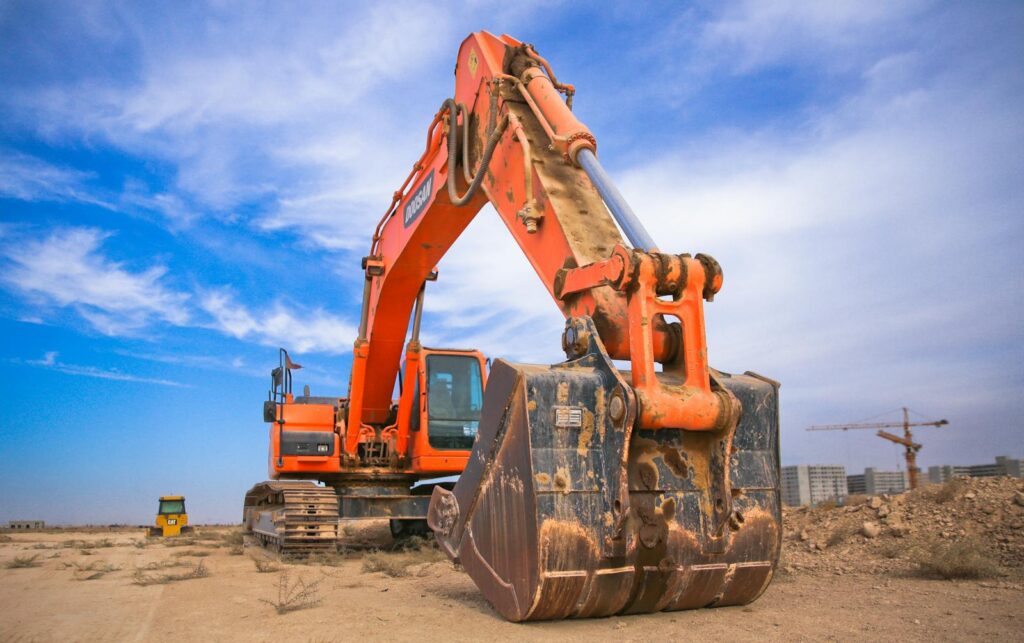
A complete investigation blends field exploration with laboratory testing and engineering analysis. In the field, a geotechnical crew mobilizes a small rig to drill borings at representative locations and depths (often below anticipated footing bottoms and sometimes to bedrock), logging soils by type, moisture, and strength indicators. They may drive standard penetration tests (SPT) or perform cone penetration tests (CPT) to quantify resistance. In coarse or variable soils, test pits expose layers visually and allow bulk sampling.
Back at the lab, technicians run sieve analyses and hydrometer tests to classify particle sizes, determine Atterberg limits (plasticity and liquid limits) that predict shrink-swell behavior, and measure moisture content, unit weight, organic content, sulfates/chlorides (concrete durability/corrosion potential), and consolidation characteristics to estimate settlement. The engineer then integrates everything into a written geotechnical report: boring logs, lab results, groundwater observations, site class for seismic design, recommended bearing pressures, proctor compaction targets, slab subgrade values (modulus of subgrade reaction, often called k-value), and foundation/drainage recommendations.
Field Tests You’ll Hear About (And What They Mean)
Standard Penetration Test (SPT)
The SPT measures how many hammer blows are needed to drive a sampler through soil at depth; the famous N-value correlates to density/consistency. It’s a simple, global workhorse that helps estimate bearing capacity and settlement potential. Higher N-values usually mean denser sands or stiffer clays—good news for shallow footings—while very low N-values flag soft, compressible soils that need improvement or deeper foundations.
Cone Penetration Test (CPT)
CPT pushes an instrumented cone into the ground at a steady rate, recording tip resistance, sleeve friction, and sometimes pore pressure continuously with depth. It’s powerful for stratified sands and sensitive clays, identifying thin weak layers SPT might miss. CPT data supports refined settlements, identifies liquefiable sands in seismic areas, and helps design ground improvement grids.
Percolation and Infiltration Tests
If you’re planning a septic system or on-site stormwater management, percolation or infiltration tests measure how quickly water moves through upper soils. Results dictate leach field sizing, trench lengths, or whether you need pretreatment or alternative systems. Even on sewered lots, infiltration data informs rainwater strategies like dry wells or permeable pavements.
Lab Tests That Turn Dirt into Design Numbers
Atterberg Limits and Plasticity Index (PI)
These numbers indicate if a soil is likely to swell and shrink. High PI clays can exert large uplift forces under slabs and footings during wet/dry cycles; your engineer may recommend moisture conditioning, over-excavation and recompaction, or post-tensioned slabs to resist movement.
Proctor Compaction (Standard/Modified)
Proctor tests establish the relationship between moisture content and maximum dry density for your soil. Specs like “95% of Modified Proctor” tell the contractor how dense to compact fills and pads. Field density verification (nuclear gauge, sand cone) keys off this lab curve; it’s how you get hard, uniform support for slabs, driveways, and footings.
Consolidation and Shear
Consolidation tests predict how much a clay will compress under load and how fast; this is time-dependent settlement that can crack finishes long after move-in if ignored. Direct shear or triaxial tests estimate shear strength for bearing and slope/retaining wall design. These are the “will it hold and will it slide?” answers.
Groundwater, Capillary Rise, and Why Basements Get Wet
Water moves three ways: under gravity, by capillarity (wicking), and as vapor. Soil testing observes water table depth and may estimate capillary rise based on grain size. Fine silts/clays wick higher; without a capillary break (clean stone layer) and vapor barrier, moisture migrates into slabs. Elevated groundwater also increases hydrostatic pressure on basement walls; the report typically prescribes perimeter drains, free-draining backfill, weep details, and sump systems sized to that reality. If you know the water story, you can design a dry house instead of fighting leaks for years.
Problem Soils and What to Do About Them
Expansive Clays
High-PI clays swell when wet, shrink when dry, and can lift or crack lightly loaded slabs and footings. Strategies include over-excavation of active clay layers, moisture conditioning and recompaction at target moisture, lime/cement stabilization, void forms under grade beams, or post-tensioned slabs tuned to resist differential movement.
Collapsible or Loose Soils (Loess, Loose Sands)
Certain dry silts collapse when wetted under load; loose sands settle under vibration. Options: pre-wetting and compaction, dynamic compaction, vibro stone columns, or moving to deep foundations (piers/caissons, helical piles, driven piles) that transfer loads to competent layers.
Organics and Peat
Organic soils compress and decay; they don’t belong under structures. The fix is removal and replacement, preload/surcharge with wick drains to accelerate consolidation, or deep foundations to bypass the layer entirely.
Sulfates/Corrosive Soils
High sulfate soils attack concrete; high chlorides increase corrosion risk for steel. Lab testing flags this; the engineer may specify Type V or sulfate-resistant cements, protective coatings, and mix designs tailored to chemistry.
Seismic, Frost, and Climate: Design That Fits the Map
Testing and mapping classify your site for seismic design (IBC Site Class) and can flag liquefaction potential in loose, saturated sands. That classification influences lateral loads and foundation detailing. In cold climates, soils with fines hold water and are frost-susceptible; footings must extend below frost depth and exterior details should prevent ponding at foundations. In hot-dry or hot-humid zones, moisture control and vapor diffusion strategies shift, but they still begin with knowing the soil’s permeability and capillary behavior.
Turning the Report Into a Foundation That Behaves
The most useful pages of a geotech report for your design team are the recommended allowable bearing pressures, slab k-values, compaction criteria, and drainage/foundation concepts. With those inputs, your structural engineer chooses among:
- Shallow foundations: spread footings, grade beams, thickened-edge slabs, or mat slabs where loads distribute over weaker soil.
- Deep foundations: drilled piers/caissons, driven piles, or helical piers bearing on deeper competent layers.
- Hybrid strategies: shallow foundation plus ground improvement to stiffen subgrade and limit settlement.
The report also guides subgrade prep: how much over-excavation, what granular base thickness, where to place a vapor retarder, and how to proof-roll and test. Think of it as the recipe; don’t bake a different cake on site.
Ground Improvement: Fixing the Soil Instead of Fleeing It
When native soils aren’t great and deep foundations aren’t desirable, improve the ground:
- Over-excavation and recompaction with well-graded fill to a specified depth.
- Moisture conditioning to reduce shrink-swell swings in clays.
- Lime or cement stabilization to create stronger, less plastic subgrades.
- Vibro stone columns or rammed aggregate piers to densify and reinforce loose soils.
- Dynamic compaction (dropping heavy weights in a grid) for loose, thick fills.
- Compaction grouting or jet grouting to fill voids and increase strength locally.
The geotech weighs cost, access, noise, and performance to recommend a method. The right improvement often costs less than a lifetime of differential settlement repairs.
Construction-Phase QC: Testing That Keeps the Promise
Great designs fail without field verification. Your report will specify field density tests for fills and pads (nuclear gauge or sand cone), acceptable moisture ranges, and criteria for proof-rolling (watching for pumping/rutting under a loaded truck). A third-party testing firm should observe footing subgrades, verify depths and bearing soils, and document that conditions match assumptions. When surprises appear—soft pockets, seepage—you pause, notify the engineer, and adjust the plan. That pause saves weeks later.
Timeline and Cost: What to Expect (and Budget)
For a typical single-family site, field work often takes half a day to two days, depending on access and number of borings. Lab testing and the written report usually follow in one to three weeks. Costs vary by region and scope, but the order of magnitude is tiny compared to foundation work—commonly a fraction of a percent of the total build. If your site is complex (slopes, high water, large footprint), budget for extra borings, specialty tests, or monitoring; it’s still cheap compared to post-construction fixes.
How to Read a Geotechnical Report Like a Pro (Without Being One)
Executive Summary and Recommendations
Start here. This section translates logs into actions: allowable bearing pressure, recommended foundation types, slab support guidelines, earthwork specs, drainage details, and pavement sections. If you only read one part, read this—and share it with your builder and engineer.
Boring Logs and Lab Data
These are the x-rays. Depth by depth, you’ll see soil types, moisture, SPT N-values, groundwater observations, and lab results (PI, grain size, unit weights). Even as a non-engineer, you can spot variability: different layers across the site may suggest different footing depths or selective over-excavation.
Design Parameters and Construction Considerations
Look for compaction targets, moisture conditioning ranges, proof-roll criteria, temporary excavation slopes/shoring notes, and weather limitations. These are the field rules; build your schedule and budget around them so you don’t “save” money by ignoring the document that makes the house behave.
Common Myths About Soil Testing (And the Reality)
“My neighbor built without testing and they’re fine.”
Maybe. Or maybe their slab is quietly settling, their doors stick every spring, and they just haven’t connected the dots. Soil varies dramatically over short distances; what worked 50 feet away can fail on your pad.
“We’ll know what’s there once we start digging.”
By then, your design and contracts are set. Discovering rock, organics, or high water in the hole is the expensive way to run a project. Testing first turns surprises into line items, not crises.
“Testing slows us down.”
It speeds you up. A clear report and plan pass inspections faster, reduce change orders, and prevent schedule-killing rework. Losing a week to redesign mid-foundation is slower than spending a day on borings up front.
Owner’s Checklist: Making Soil Testing Work for You
- Hire a licensed geotechnical engineer (not just a drilling service). Ask for residential experience on similar soils in your region.
- Share plans, loads (if known), and constraints (walkout basement, retaining walls, pools) so the scope fits your project.
- Request borings at corners/critical lines and to appropriate depths; ask for seasonal groundwater commentary if timing is suspect.
- Require a report with bearing, slab k-value, compaction, drainage, and clear foundation recommendations—not just logs.
- Build the recommendations into contract documents: earthwork specs, compaction criteria, vapor barriers, and drainage details.
- Engage a third-party testing/inspection firm during earthwork and foundation to verify compliance.
- If conditions differ from the report, stop and call the geotech/engineer. Field changes are cheap now and expensive forever later.
Frequently Asked Questions
Do I always need borings for a simple slab-on-grade?
If you’re on uniform, well-known soils and many nearby houses share the same performance history, a limited investigation might suffice. But even simple slabs benefit from at least one boring and a lab PI/moisture profile; it’s the only way to spot expansive or collapsible layers before they surprise you.
Can I reuse my neighbor’s geotech report?
No. Soil varies lot to lot, depth to depth. Reports are project-specific and make assumptions about loads, grading, and drainage. They’re valuable background, but not a substitute for your own investigation.
What if my report says I need deep foundations—am I doomed?
Not at all. Sometimes ground improvement can bring you back to a shallow system at lower cost. Other times, piers are the efficient path once you compare true costs (including risk). Ask your geotech and structural engineer to price alternates with both cost and time impacts.
Do I need environmental testing too?
Different scope. Phase I ESA/Phase II environmental assessments check for contamination, while geotechnical testing checks engineering properties. On former industrial/agricultural sites or near known hazards, plan for both; they answer different questions.
How does soil testing help with radon?
While radon measurement is usually post-construction, the geotech can flag lithologies and permeability that increase risk. More important, knowing soil moisture and permeability guides sub-slab ventilation details that double as radon mitigation pathways later.
The Quiet Payoff: Faster Schedules, Fewer Headaches, Longer Life
A well-written soil report is the most boringly valuable document on a residential build. It predicts how the ground will react when you add a house and how to prep the site so nothing dramatic happens. It cuts re-inspections because footing bottoms are right the first time. It lets you order the right concrete and reinforcement once, not twice. It compresses the finish schedule because slabs stay flat, basements stay dry, and seasonal swings don’t split your trim. And years down the road, it keeps you from joining That Forum Thread about mystery cracks and doors that won’t latch every July.
Bottom Line: Test the Soil, Design to It, Verify in the Field
Homes fail slowly and expensively when builders pretend the ground is uniform. The cure is simple and proven: test, design, and verify. Get the borings and lab data that describe your site. Use those numbers to pick and detail a foundation, drainage, and slab system that fits the earth you actually have. Then test compaction and bearing during construction so the promise on paper becomes the reality under your feet. Do that, and the piece of your home you’ll never see—the soil and the interface with it—will quietly do its job for generations.